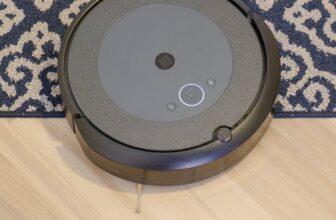
![Find out how to Clear a Roomba 675 Robotic Vacuum [Simple Steps]](https://vacuumop.com/wp-content/uploads/2025/10/How-to-Clean-a-Roomba-675-Robot-Vacuum-Simple-Steps.webp.webp "Find out how to Clear a Roomba 675 Robotic Vacuum [Simple Steps]")
Take a look at our newest merchandise


In case your Roomba 675 or 690 isn’t cleansing in addition to it used to, it might simply want a radical cleansing.
Routine upkeep is among the finest methods to maintain your Roomba working effectively for years.
On this information, I’ll present you the best way to clear the Roomba 675 step-by-step utilizing solely a Philips screwdriver and a microfiber towel — no particular instruments required.
Why Common Cleansing Is Necessary
Robotic vacuums just like the Roomba 675 gather mud, hair, and particles each day. Over time, this buildup can scale back suction, clog rollers, and pressure the motor.
By cleansing your Roomba frequently, you’ll:
- Prolong its lifespan
- Enhance suction efficiency
- Scale back noise and mechanical pressure
- Keep away from costly repairs down the highway
What You’ll Want
- Philips screwdriver
- Microfiber towel (for mud and hair removing)
Non-obligatory:
- Small brush or compressed air for hard-to-reach areas
Step-by-Step Information to Cleansing Your Roomba 675
Step 1: Take away the Facet Brush
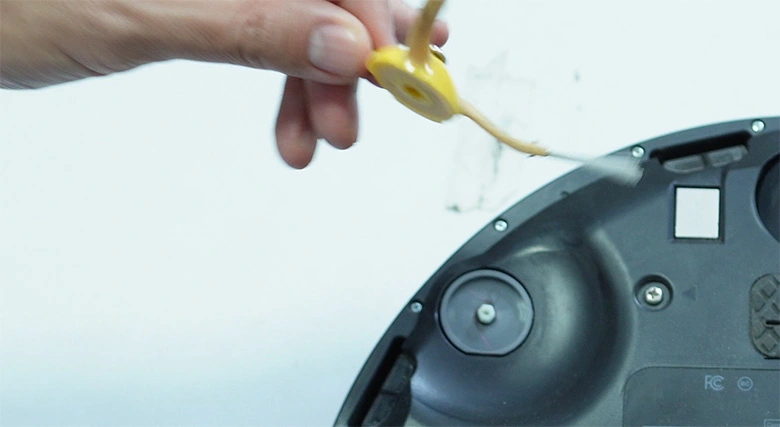
Begin by flipping your Roomba the other way up.
Use the Philips screwdriver to loosen the only bolt that holds the aspect brush.
As soon as it’s eliminated, set the comb apart.
💡 Tip: Test the bottom of the comb for tangled hair — this space typically will get neglected.
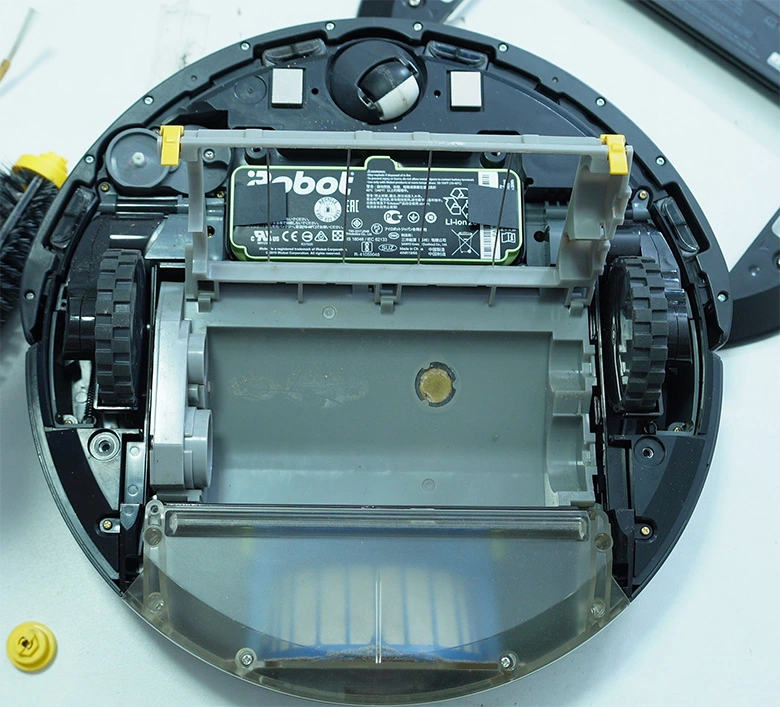
Step 2: Loosen and Take away the Base Plate
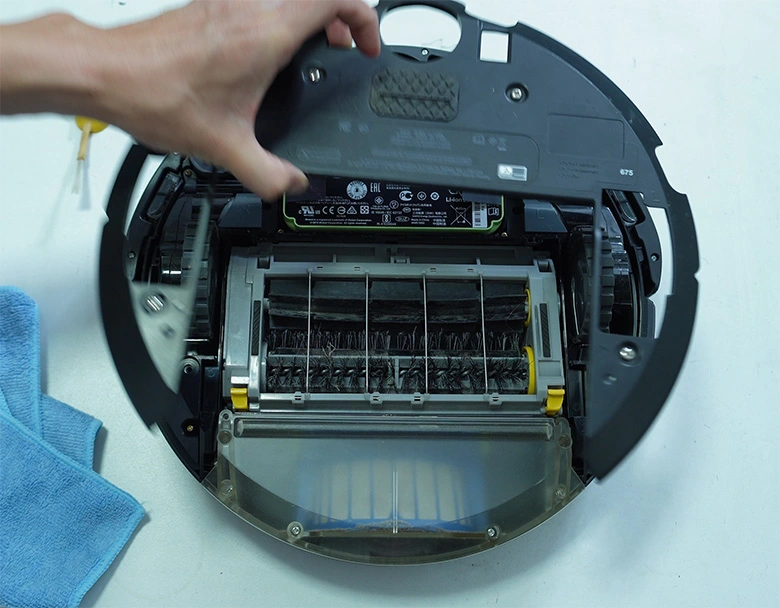
With the aspect brush out, you’ll have entry to the 4 bolts holding the bottom plate.
Loosen them utilizing your screwdriver — there’s no have to take away the bolts utterly.
As soon as loosened, carry off the bottom plate to reveal the inner parts.
Earlier than shifting on, examine this space for any hair or grime buildup, particularly across the edges.
Step 3: Clear the Brushes and Axles
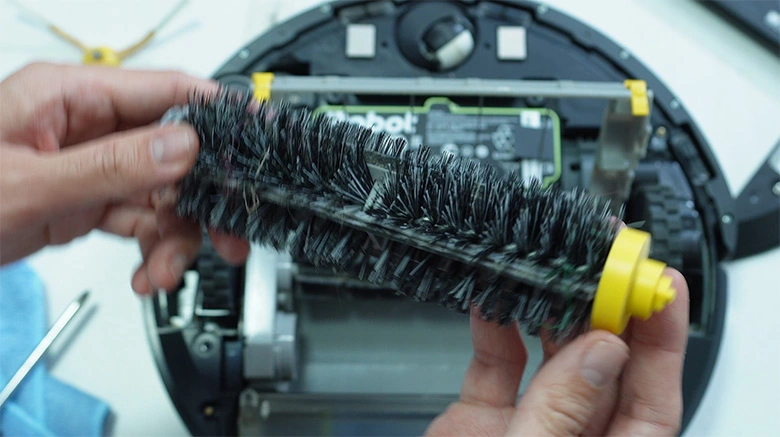
Subsequent, take away the primary curler brushes. You’ll probably discover hair wrapped across the ends and axles.
Use your microfiber towel to wipe off mud and particles from the rubber and bristle brushes.
Take away the axle guards to examine for hidden hair wrapped across the metallic shafts.
After cleansing, reattach the guards and reinstall each rollers.
Step 4: Clear the Dustbin and Filter
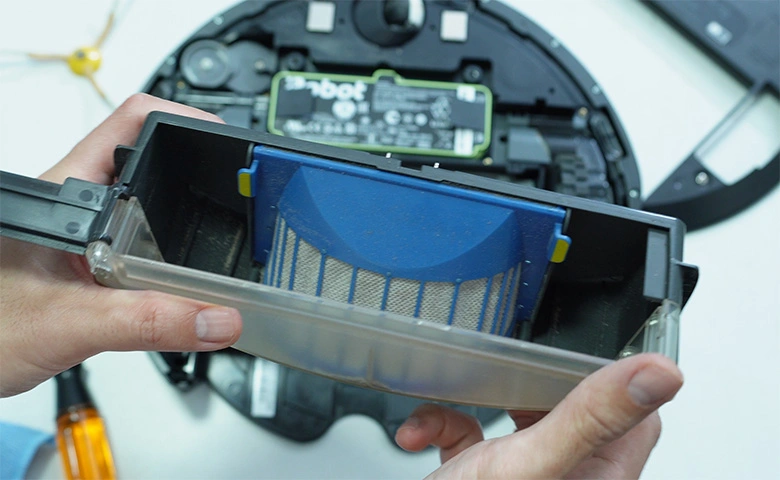
Take out the dustbin and take away the filter.
Gently wipe the filter’s floor together with your microfiber towel to take away mud.
⚠️ Necessary: Don’t wash the dustbin with water — the fan motor inside can get broken.
As an alternative, use a dry microfiber towel to wash the interior surfaces and the world across the fan.
Step 5: Wipe the Internal Parts
Now that the bottom plate is off, wipe all of the interior parts you may attain.
Pay particular consideration to areas with stuck-on mud or particles.
Even when your robotic doesn’t look very soiled, common cleansing prevents buildup that may have an effect on efficiency.
Use the clear space of your microfiber towel and gently wipe the drop sensors.
Step 6: Clear the Entrance Caster Wheel
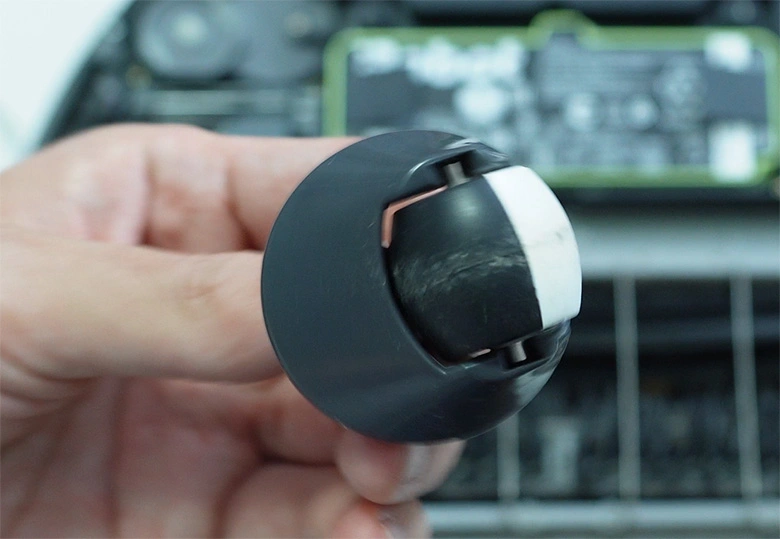
Pull out the spinning entrance caster wheel and wipe off any gunk or hair wrapped round it.
This small wheel helps your Roomba navigate — protecting it clear ensures easy motion.
Step 7: Clear the Facet Wheels
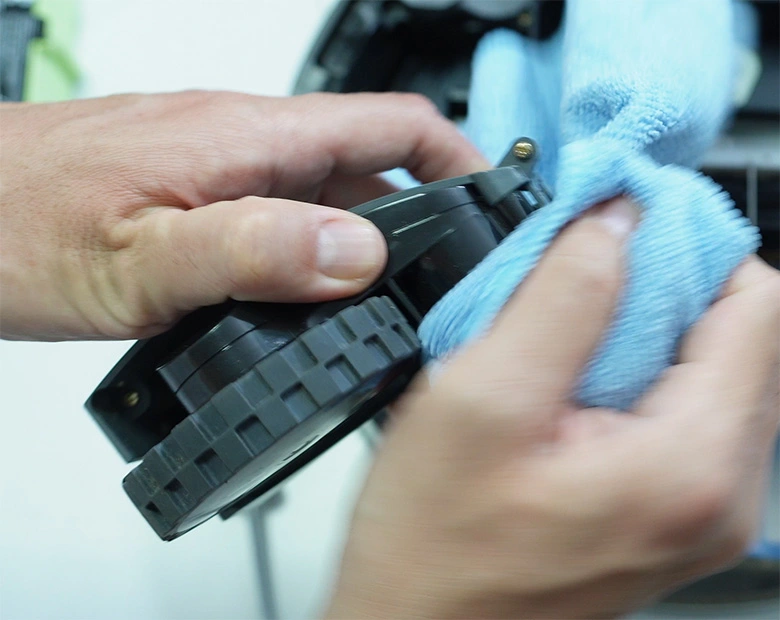
Utilizing a smaller screwdriver, loosen the three bolts holding either side wheel.
Elevate every wheel meeting out and clear the nooks and crannies round it together with your microfiber towel.
Repeat the method for the opposite wheel.
As soon as accomplished, slide each wheels again in place and tighten the bolts.
Step 8: Reassemble Your Roomba
Now it’s time to place all the things again collectively:
Reattach the bottom plate and tighten the bolts.
Reinstall the aspect brush and safe it with the screw.
Flip your Roomba upright and energy it on to make sure all the things works correctly.
That’s it — your Roomba 675 (or 690) is now clear and prepared for motion!
Closing Ideas
A radical cleansing each few weeks retains your Roomba performing like new.
With only a few easy instruments, you may stop clogs, enhance suction, and prolong your robotic vacuum’s lifespan.
Garrick, the visionary behind Cordless Vacuum Information, brings over a decade of hands-on experience in cordless vacuum testing to his insightful opinions showcased on this platform. Past his ardour for empowering customers with knowledgeable selections, he cherishes treasured moments along with his household, exploring international cuisines and exploring completely different horizons along with his beloved spouse and son. Comply with him on Youtube, Tiktok, Fb, and Instagram.


![Find out how to Clear a Roomba 675 Robotic Vacuum [Simple Steps]](https://vacuumop.com/wp-content/uploads/thumbs_dir/5-Essential-Maintenance-Tips-to-Get-the-Most-from-Your-rdtf0yntjnuy6143rj8r823uiwicpuow2dj30ijha4.jpg)
![Find out how to Clear a Roomba 675 Robotic Vacuum [Simple Steps]](https://vacuumop.com/wp-content/uploads/thumbs_dir/BEFORE-YOU-BUY-a-Dyson-Cordless-Vacuum-Read-This-Common-r7j0x21j2s14lunoi2y67ifusf0m5tisrvewi3fqrg.jpg)